Attention: the Extra Topics appendix contains and will contain some in-depth topics omitted in the first draft of the guide/book and is made possible by the purchase of the ebook as well as donations made on the site for the free version.
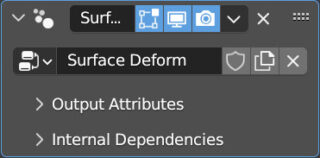
In paragraph 5.3 dedicated to the powerful Geometry Nodes system, we saw that thanks to it there is an extremely versatile alternative to the classic particle systems. This is true for both Emitter particle systems and Hair particle systems as the 3.3 release introduced a system dedicated to creating hairs and hairs based on geometry nodes, which however can be used transparently without having to touch the node editor, which is why anyone who is not yet confident with the logic of nodes (which in blender is essential in defining shaders) can safely continue reading. Let’s start with the classic UV Sphere, maybe divided once with the SubSurf modifier. After selecting it, go to the Add menu (in the 3D View header) and select Curve>Empty Hair. We immediately notice two things, the first is that the new Curves object is related and linked to our mesh, as visible in the outliner.
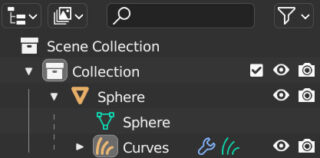
However, we have no need to further investigate the nodes used, so we will move directly to the hair definition phase. When the Curves object is selected, we see that in addition to the object mode, there is a sculpt mode available for it that has nothing to do with the one described in paragraph 2.6 for meshes, as it is much more similar to the Particle Edit mode seen for hair particle systems in paragraph 7.4, with which it shares some tools as we can see in the following images.


By default, we find the Density tool selected, but let’s start with the first and most obvious one, Add ![]() , which is used to add the first hairs to our mesh. All these tools will have common settings, such as the fundamental radius of action of the brush (represented by a red circle), which can be found at the top of the 3D view or in the Active Tools properties context, as well as in the Tool tab of the sidebar (press N).
, which is used to add the first hairs to our mesh. All these tools will have common settings, such as the fundamental radius of action of the brush (represented by a red circle), which can be found at the top of the 3D view or in the Active Tools properties context, as well as in the Tool tab of the sidebar (press N).
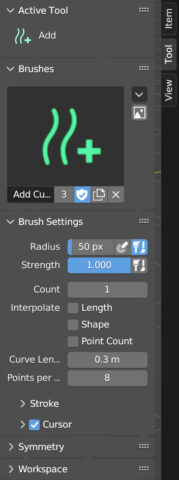
Unlike Hair particle systems, which automatically filled the entire mesh or defined areas with hair using Weight Mode, with the Curves system, we will be able to precisely define the areas covered by hair in sculpt mode. In addition to the brush radius (Radius), we can set the number of hairs to be inserted with a single mouse click, which can obviously be extended to draw our distribution of hair on the mesh.

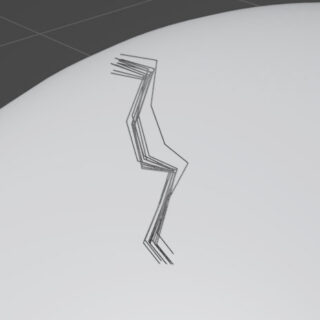
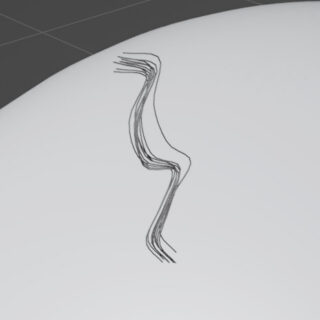
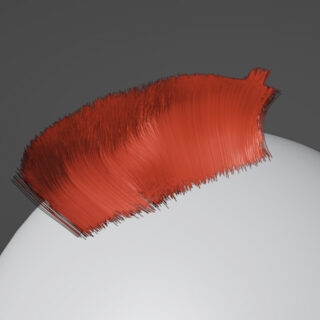
Let’s try using the Comb tool (comb), icon ![]() , right away to change the shape of the hairs inserted with the Add tool. You will immediately see that the default representation of the hairs is made with a few vertices.
, right away to change the shape of the hairs inserted with the Add tool. You will immediately see that the default representation of the hairs is made with a few vertices.
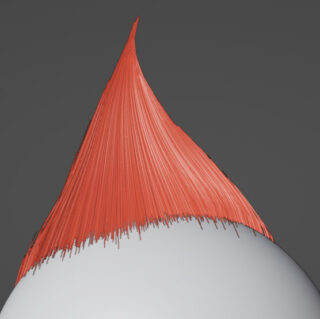
Just go to the Render properties context (eevee) Curves panel
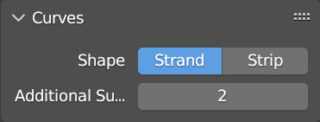
and increase the default Additional Subdivision value, which is set to 2
In Cycles, you will find this panel in Viewport Display, always within the Curves panel in the render properties context.
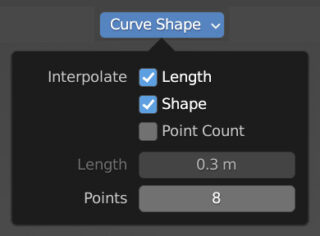
Another important feature of the Add tool is the type of Curve Shape, or the shape with which the new hairs will be created (by default, perfectly straight). Suppose we already have defined and combed hairs, and we want to add more nearby with the same shape, length, and number of points; all we have to do is go to the Curve Shape at the top of the 3D view or in the Brush Settings field in the Tool tab (press N) and check the boxes for Length, Shape, and possibly Point Count.
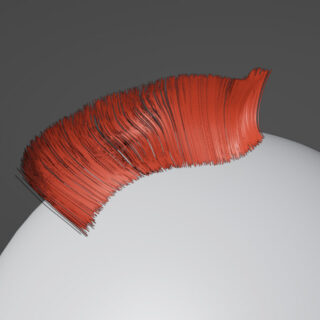
To change the color of the hair in the 3D viewport, just assign any material to the Curves system (even without using nodes) and act on the Viewport Display panel of the Material properties context. With the Selection Paint tool, we can select only some hairs (by default, all are selected) that are lighter in color in the 3D view compared to those that are not selected (press A to select all hair, twice to deselect). Sculpt tools such as Comb will obviously only affect selected hair. The operation of the Delete tool is clearly obvious and serves to delete hair within the radius defined with Radius. So we come to the Density tool, icon ![]() , very similar to Add but more intelligent thanks to the Auto function, selected by default, with which it is possible to fill in the empty areas but not those already occupied by the presence of hair.
, very similar to Add but more intelligent thanks to the Auto function, selected by default, with which it is possible to fill in the empty areas but not those already occupied by the presence of hair.
Excluding the Add and Delete tools, all others have the Strenght (0-1) setting ![]() which, like the Radius, can make use of the pressure levels of graphics tablets giving total and natural control in the sculpting phase, instead of the more limited particle systems (whose strength lies in the possibilities of animation, both with physics and without). Obviously, the effect of each of these tools is conditioned by the angle at which we observe the mesh and the curves system related to it in the 3D View. The Snake Hook tool, icon
which, like the Radius, can make use of the pressure levels of graphics tablets giving total and natural control in the sculpting phase, instead of the more limited particle systems (whose strength lies in the possibilities of animation, both with physics and without). Obviously, the effect of each of these tools is conditioned by the angle at which we observe the mesh and the curves system related to it in the 3D View. The Snake Hook tool, icon ![]() , helps to sculpt the hair by increasing the length and at the same time shaping the strands.
, helps to sculpt the hair by increasing the length and at the same time shaping the strands.

The Grow/Shrink tool, icon ![]() , very simply serves to increase and decrease the length of the hair depending on whether the direction is selected
, very simply serves to increase and decrease the length of the hair depending on whether the direction is selected ![]() .
.
The Pinch tool, icon ![]() , is used to tighten and sharpen strands
, is used to tighten and sharpen strands
The opposite effect is produced by the Puff tool, icon ![]() .
.
The Smooth tool, icon ![]() is literally used to smooth strands.
is literally used to smooth strands.
Finally, the Slide tool, icon ![]() , acts on the roots of the hair, moving them along the surface of the mesh.
, acts on the roots of the hair, moving them along the surface of the mesh.
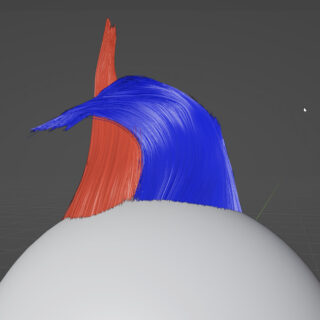
Obviously, a mesh can have different Hair Curves systems that can be manipulated without altering the others in any way.
Once the Hair system is defined, you may realize some limitations, such as not being able to increase the thickness of the hair or animate it in a way that is more or less consistent with the laws of physics. While waiting for future releases of Blender to implement new features, it is possible to use two alternatives: the first is to convert the system into a particle system, with the only drawback being that animating a physical dynamics can be quite computationally heavy. The second possibility is to work with the node system. Having set up the paragraph with the premise that it is not necessary to know the complex geometry node system, I leave you free to follow the various tutorials on this subject.
Previous paragraph
Back to Index
Wishing you an enjoyable and productive study with Blender, I would like to remind you that you can support this project in two ways: by making a small donation through PayPal or by purchasing the professionally formatted and optimized for tablet viewing PDF version on Lulu.com