
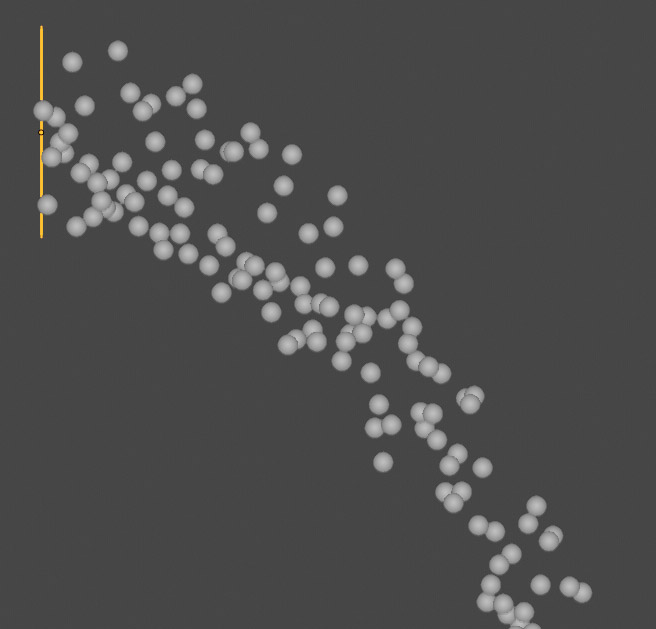
You will find yourself in front of a complex set of panels and options that is the most intricate sequence of commands in all of Blender. As usual, let’s not be intimidated and focus exclusively on what happens in the 3D View by starting the animation (without worrying about rendering). Depending on the orientation of the plane, you will see a number of particles appear from its surface, represented in the 3D View by small circles like this:

These particles are generated from the entire surface for a given period of time and emitted in the direction of the normals with their own initial velocity. The motion is influenced by the force of gravity and after a certain number of frames, the particles disappear into nothing. In Blender, in fact, we have two different types of particle systems, the one just seen of the Emitter type (default setting) and another of the Hair type in which the elements are instead fixed, attached to the surface, and represented in the 3D View by broken lines with N segments. In this paragraph, we will deal with the emission of particles whose fundamental parameters are in the Emission panel:
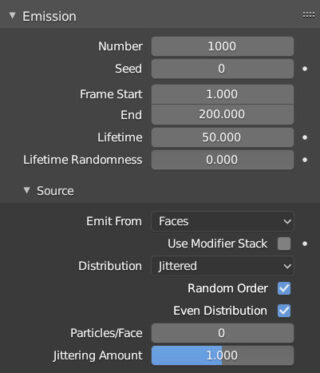
- Number is the total number of particles that will be emitted (up to a maximum of one million).
- Frame Start and End are the starting (start) and final (end) frames of the emission interval.
- Lifetime is the duration, in frames, of the particles’ life.
- Random creates a margin of randomness in the lifetime.
In the Emission panel, we find the additional Source panel and in particular the Emit From field. Emission can occur from
- the vertices of the mesh.
- any point on the surface of the mesh.
- any point inside the mesh (if closed and therefore with an internal volume).
We will consider Jittered emission, leaving the checkmark on both Random Order and Even Distribution, so as to have a random and uniformly distributed emission on the entire surface of the mesh, regardless of the presence of faces with different sizes. Below the Emission panel, we find the one reserved for the Cache, similar to what was seen for the soft body and cloth dynamics.
So we come to the important Velocity panel
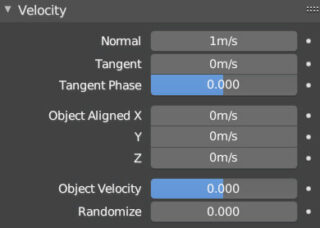
where we can adjust the initial velocity of the particles in the direction of the normal (default) or tangent, or in one of the xyz directions understood in the local system of the emitter, or finally with a velocity derived from the possible motion of the emitter itself (Object Velocity).
To better study the effect of gravity on the generated particles, we rotate the starting plane with the normal orthogonal to the z axis so that the particles are launched in a parabolic trajectory with an initial velocity expressed by the Normal value (meters per second). Randomize creates a margin of randomness in the initial velocities of the particles.
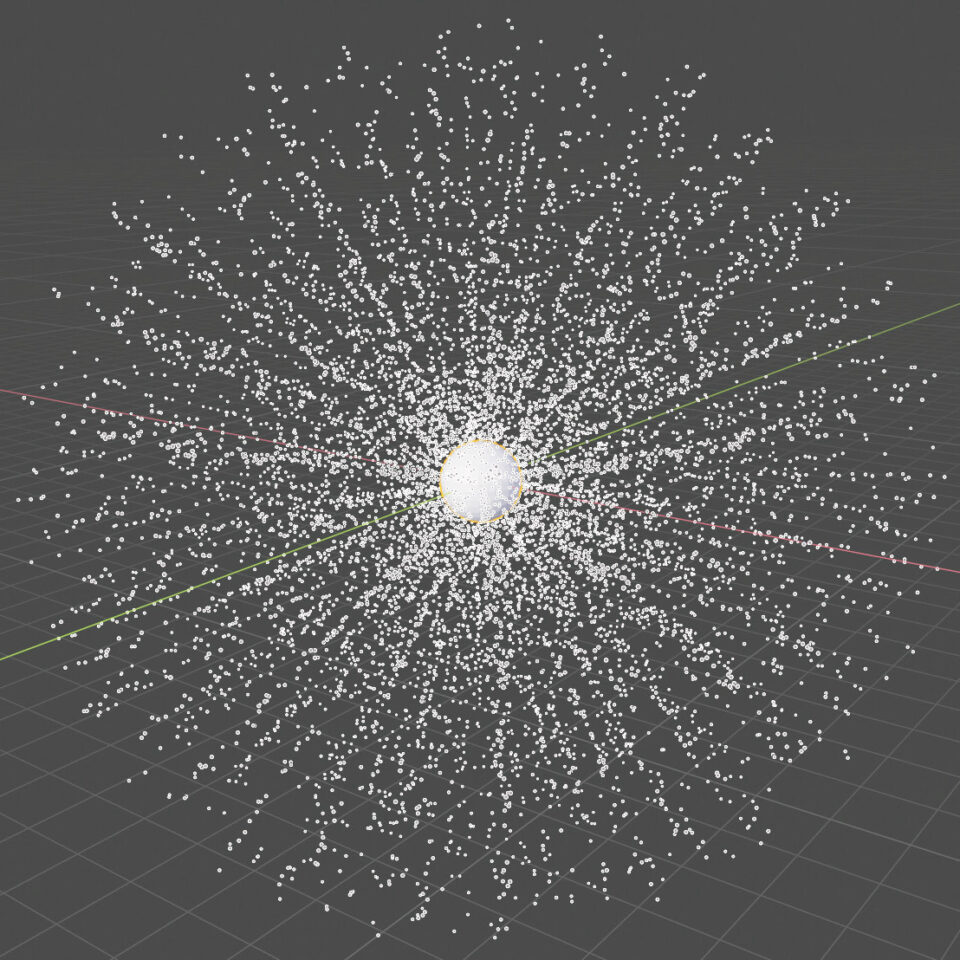
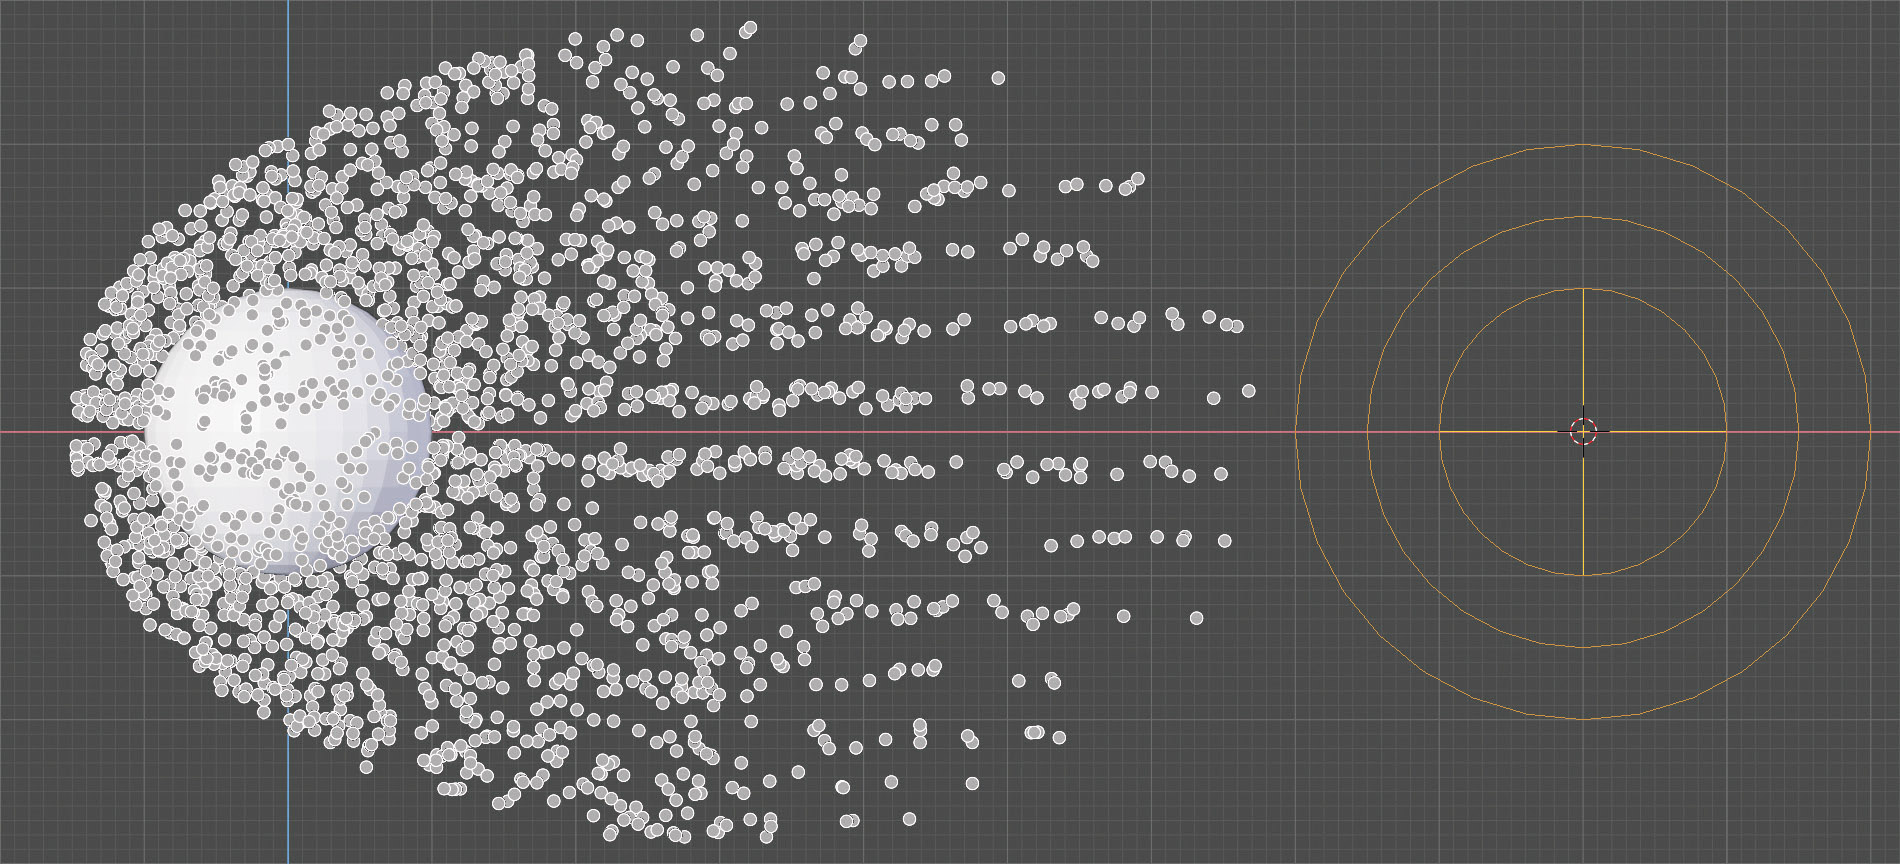
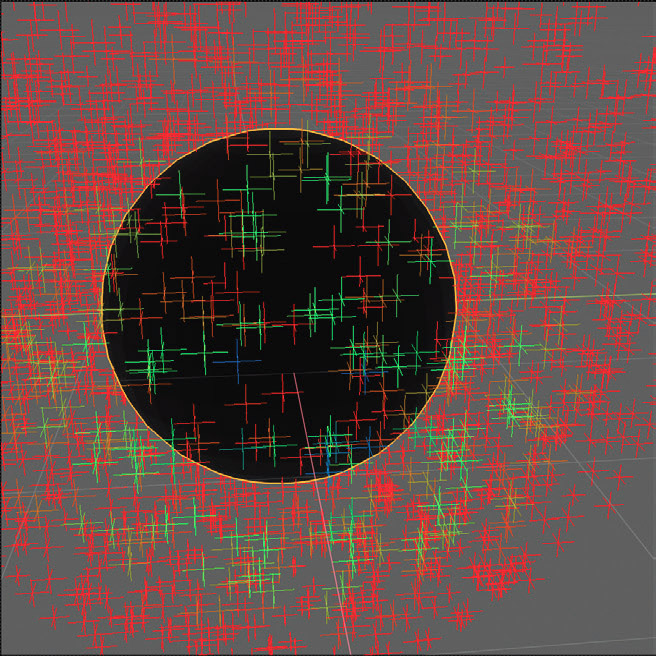
Before understanding how to render these particle systems, let’s continue to consider their representation in the 3D View, studying the effects and functioning of force fields. This time, we start from a UV Sphere, assigning it a particle system identical to the previous one. Then, in the Field Weight panel, we cancel the effect of gravity by zeroing the Gravity value, maintaining emission for the entire frame range (e.g., 0-400) with a life time equal to or greater than the total number of frames (>400). When the animation is started, you will see the emission of particles expanding from the surface of the UV Sphere, moving in a uniform straight line along the normals of the generating faces. With a high number of particles, for example 10,000, we will obtain a sphere of points that will expand over time.
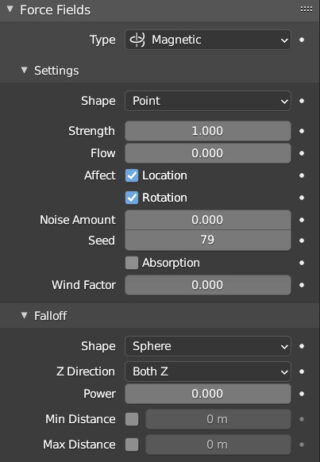
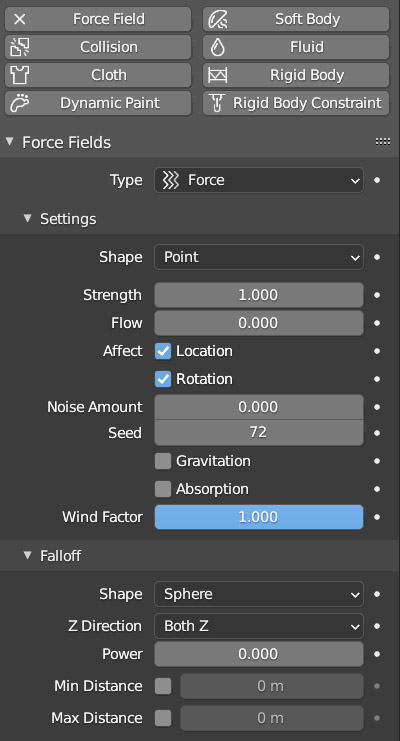
In the following image you can see the list of Force Fields available in Blender (menu Add > Force Field in the header of the 3D View)
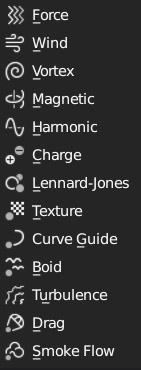
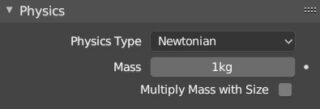
Let’s try out some of them on the particle system we just created, considering that a Newtonian physics is active in the Physics panel for it (I recommend also testing Boids, similar to the flight of flocks, or Fluids):
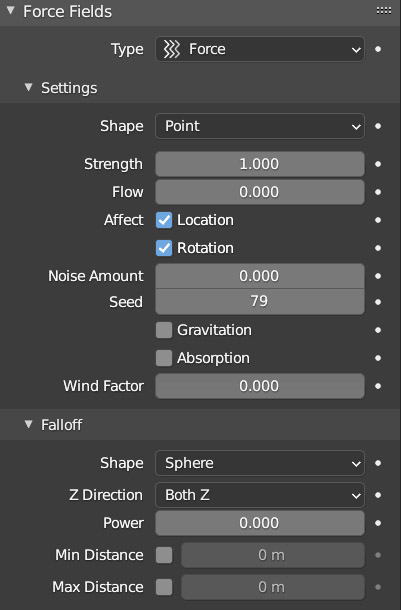
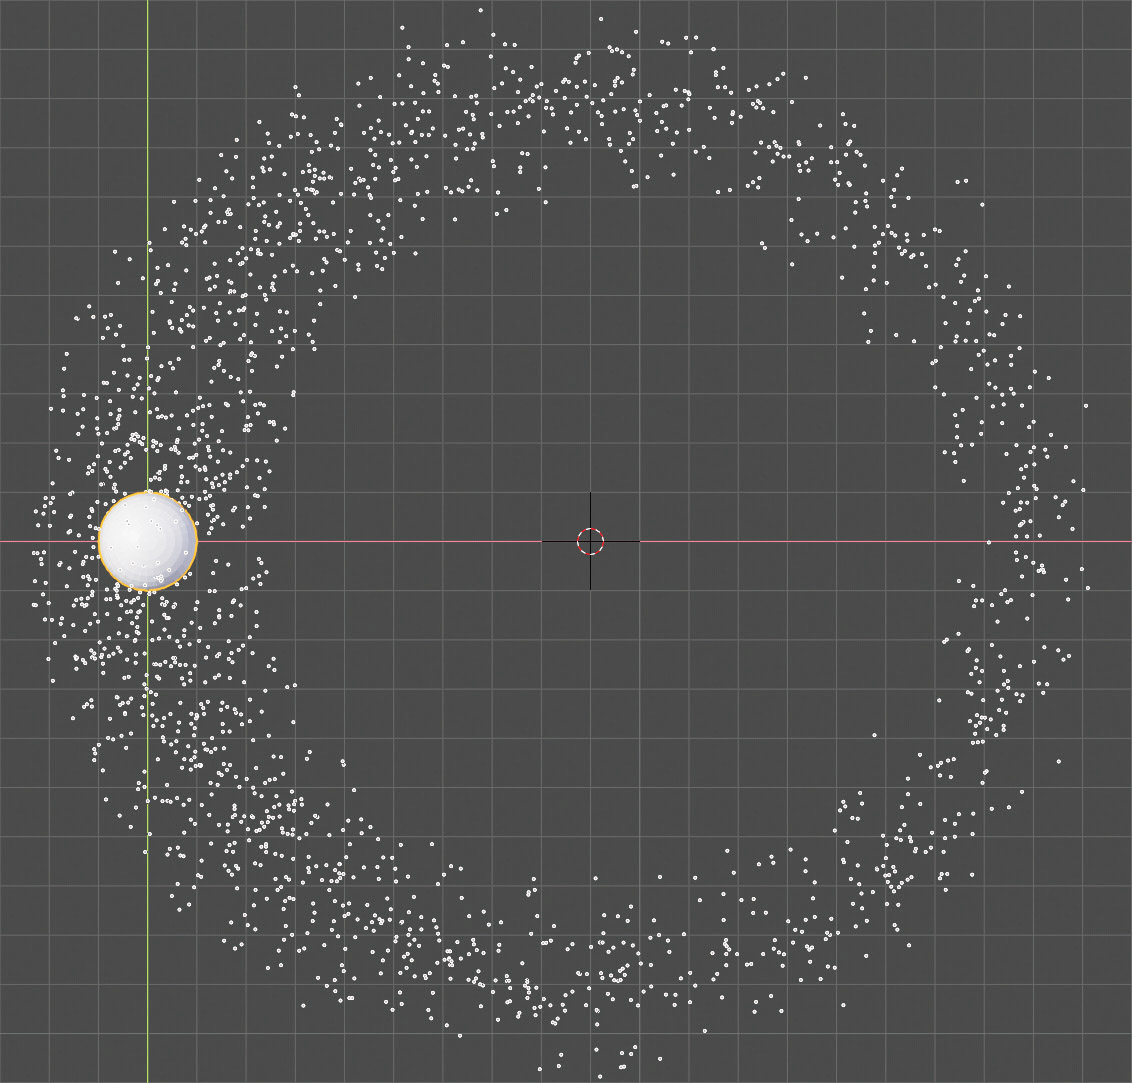
Force is a type of attractive/repulsive force field. Its strength can take on positive values (repulsive effect) or negative values (attractive effect).
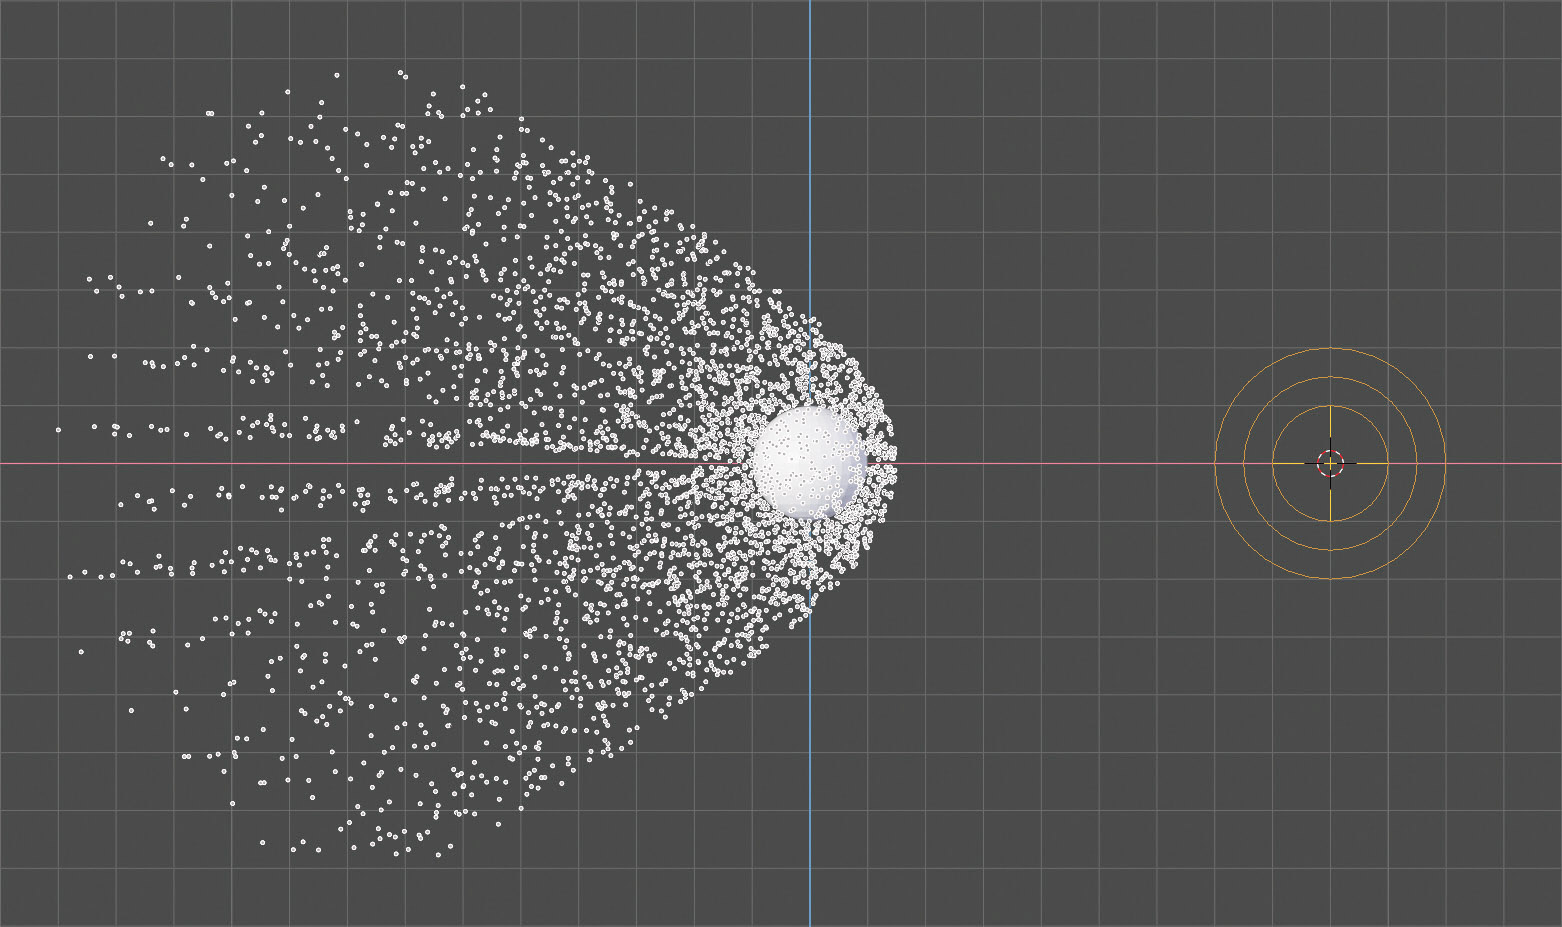
The motion of the particle system is more complex in attractive fields as the particles, overcoming the attraction point by inertia, will tend to go back and repeat the same dynamics in the opposite direction. You can observe the evolution of the system in real time by rotating the view and observing the motion in three dimensions.
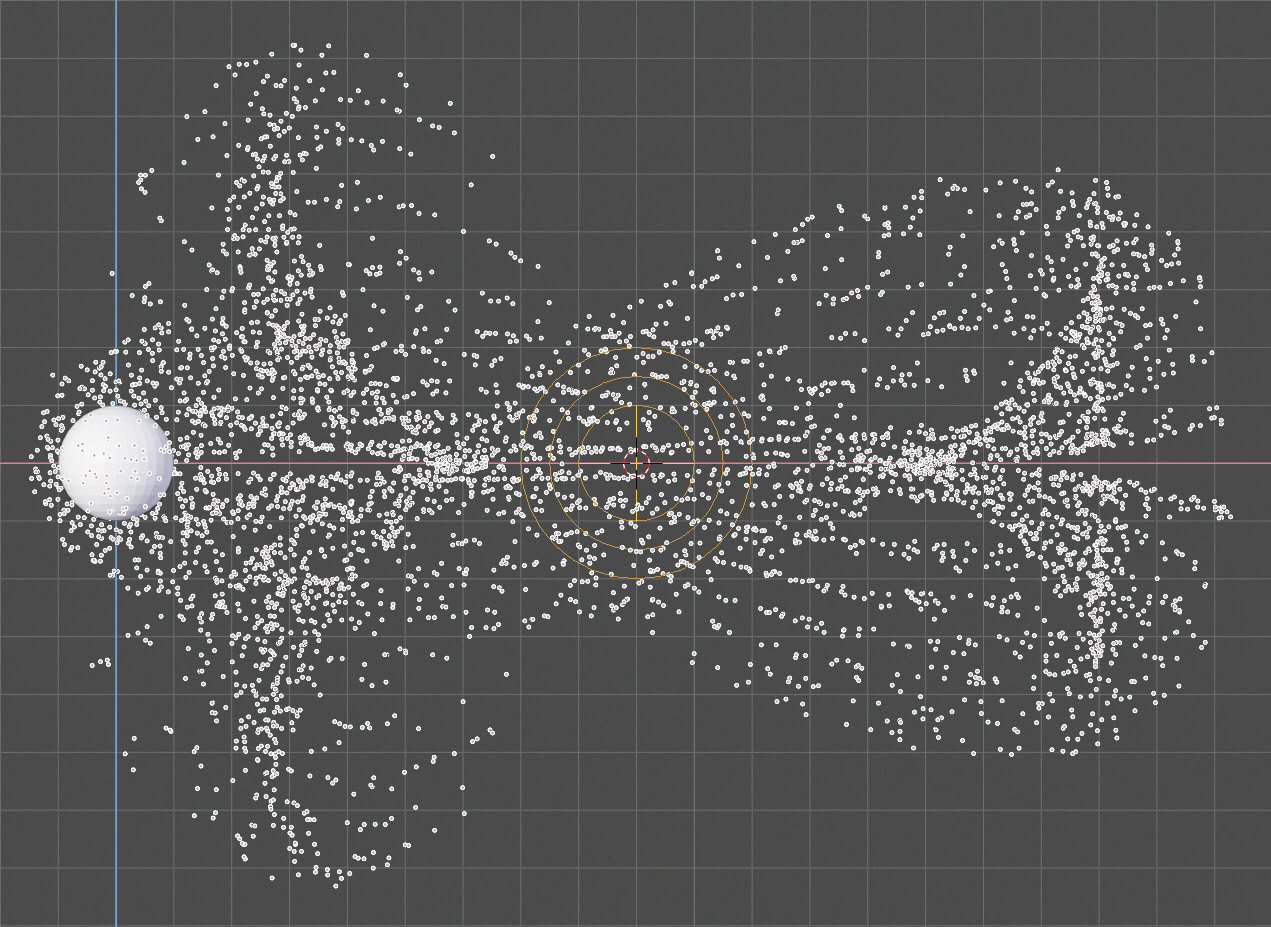
Turbulence creates complex and chaotic motion (in these examples we have always used the setting Shape>Point). If we want to limit the emission to only some parts of the mesh, it will be enough to create the corresponding vertex group and assign it to the particle system, in the Vertex Group panel under the Density heading.
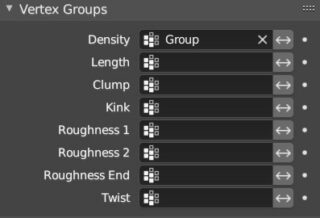
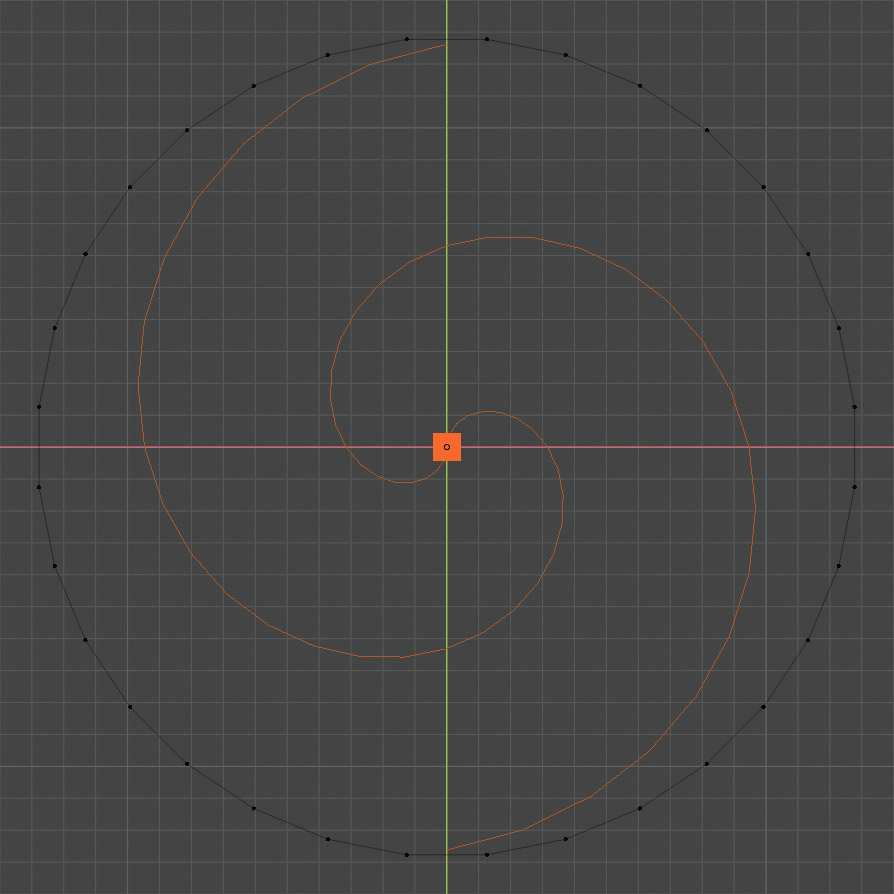
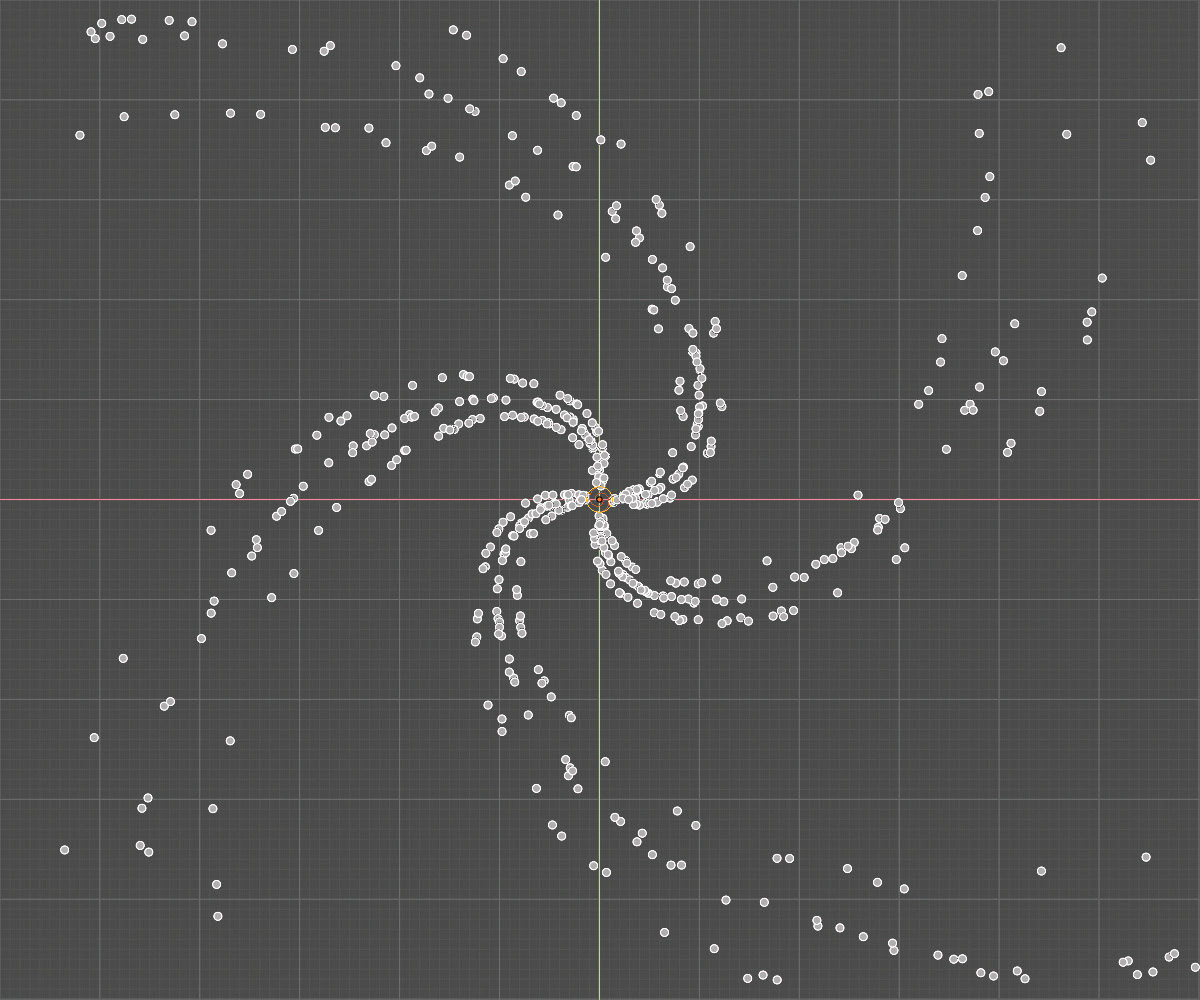
Note that clicking on ![]() will reverse the emission to the entire mesh, except for the part identified by the vertex group. As an example, let’s take a Cylinder primitive and limit the emission to a vertex group made up of four zones of the cylindrical surface, diametrically opposite to each other and arranged in a cross. Then we insert a Vortex-type force field as shown in the figure, to obtain a spiral-shaped particle field.
will reverse the emission to the entire mesh, except for the part identified by the vertex group. As an example, let’s take a Cylinder primitive and limit the emission to a vertex group made up of four zones of the cylindrical surface, diametrically opposite to each other and arranged in a cross. Then we insert a Vortex-type force field as shown in the figure, to obtain a spiral-shaped particle field.

Force fields can also be generated from the meshes present in the scene, by activating Force Field in the Physics context (possibly together with the dynamics already seen in previous paragraphs).
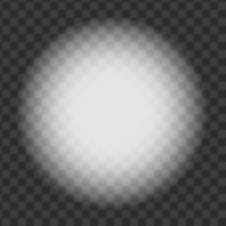
But as far as rendering is concerned, it will always be particle-free. In the old Blender Render engine it was possible to use so-called Halo materials (alone or aura), that is, a semi-transparent circle centered on each particle, whose appearance did not depend on the viewing angle, but varied in size depending on the distance from the observation point, in full respect of perspective rules. It was therefore possible to directly render a particle system without having to place any mesh in place of each single particle processed in the 3D View. In Blender Cycles and Eevee things are different and we will have to go to the Render panel (right image) where we will choose Object in Render As.
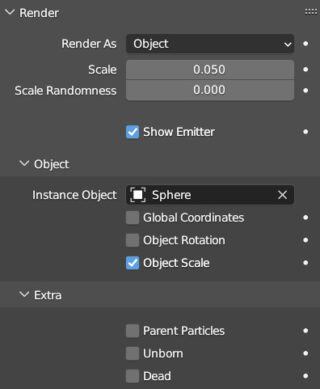
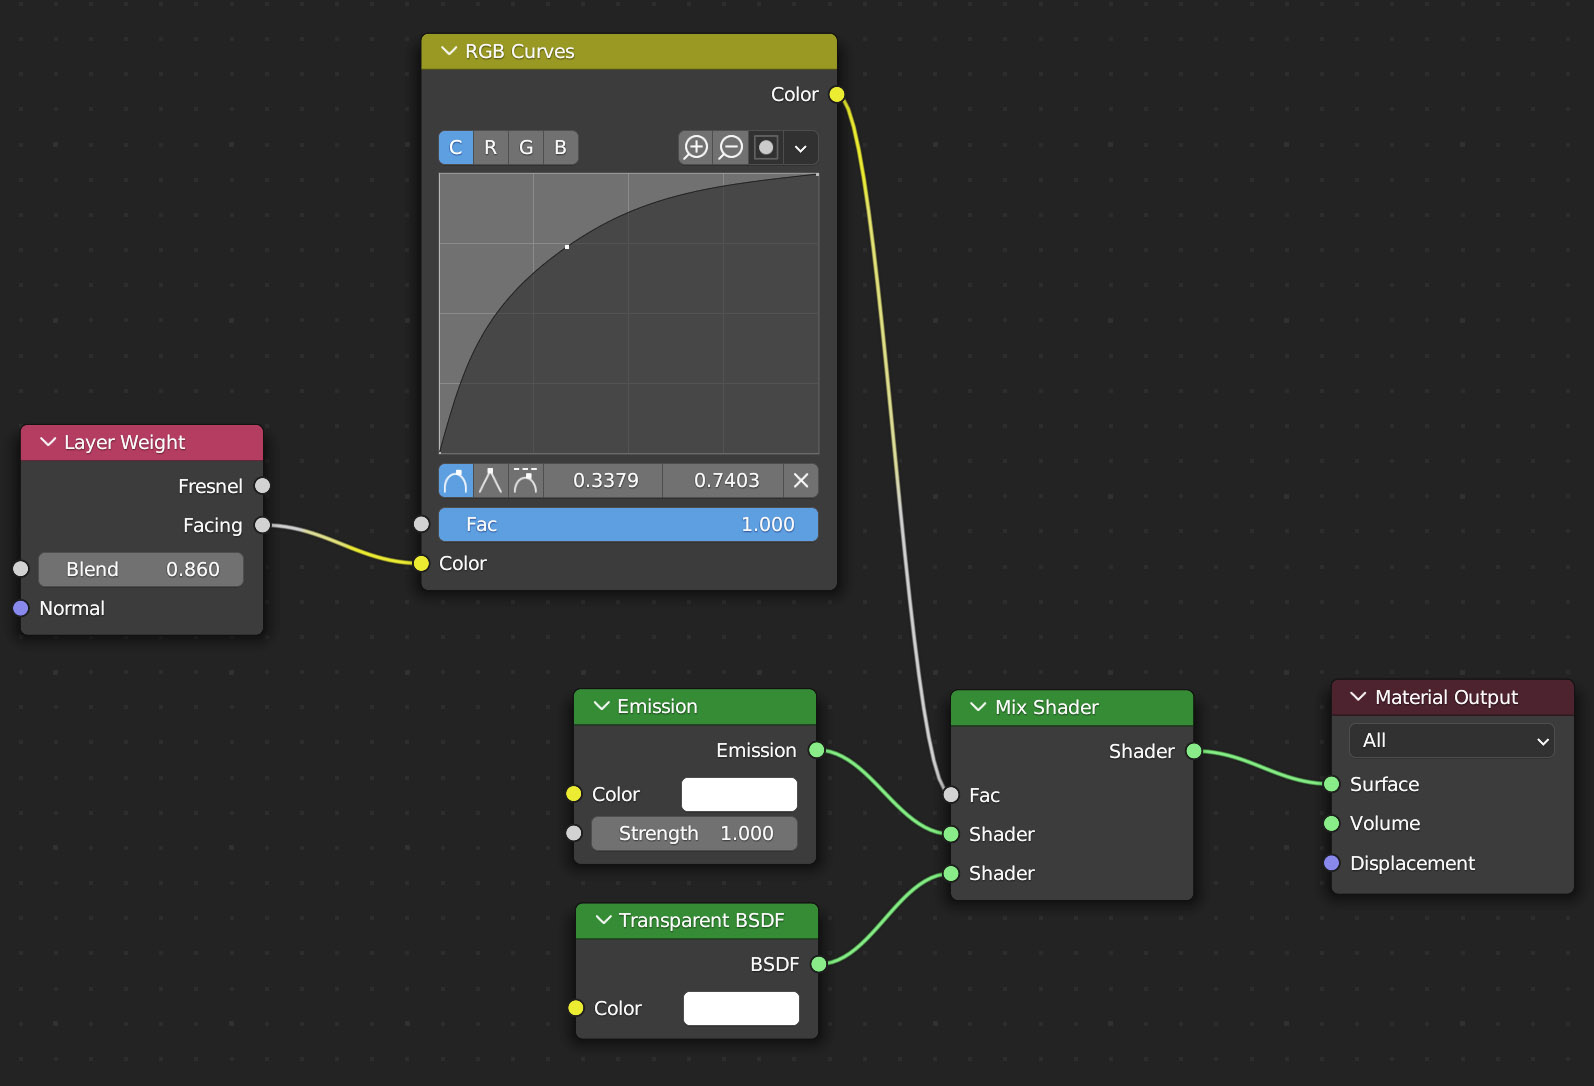
Then it will be enough to indicate the “instance” object in the sub-panel Object, that is, the mesh that will be multiplied and placed so that its center coincides with the position of each single particle processed. For example, we can use a UV Sphere (belonging to the scene even if invisible) to which we will assign the material visible in the following image created specifically to simulate with Cycles the old halo of the Blender Render engine.
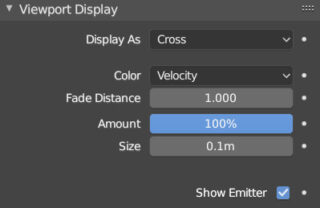
We can choose not to render the emitting mesh by unchecking the Show Emitter box, or increase the size of the emitted meshes with Scale, and finally change their size randomly with Scale Randomness.
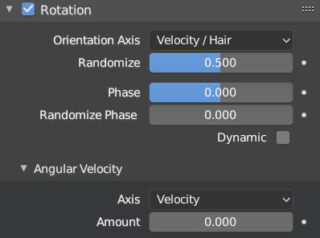
When a particle system is made up of a large number of meshes (not spherical), you can set a random rotation for each of them by activating the Rotation panel of the particle system and increasing the default Randomize value of 0.


In the top image, we see three particle systems emitted from a single emitter object, each of which duplicates N times a single instance mesh. Thanks to a random factor in the rotation and scale variation, the eye is deceived and does not perceive the repetition of only three types of asteroids. Motion Blur and depth of field make it all more realistic and focus attention on the perfectly focused mesh on the right (this one was manually positioned in that point).
Next paragraph
Previous paragraph
Back to Index
Wishing you an enjoyable and productive study with Blender, I would like to remind you that you can support this project in two ways: by making a small donation through PayPal or by purchasing the professionally formatted and optimized for tablet viewing PDF version on Lulu.com