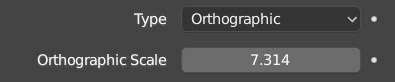
In the last paragraph of this chapter, we will delve into the camera object, analyzing at the same time some interesting functions of the Eevee rendering engine. The default setting for the camera is the Perspective type, but we can opt for the orthographic view, useful for example in the technical field, with which we can also create 3D isometric images or 2D renderings (side views) with shading effects. This is how the Object Data properties context for the camera looks like

In orthographic mode, we have a scale factor useful for enlarging or reducing the size of the subject.
For the Perspective camera, we find the Focal Length value instead, that is, the focal length of the lens expressed in millimeters (or alternatively in degrees – Field of View) which in digital cameras represents the distance between the nodal point of the lens (a sort of optical center) and the sensor. Practically, we will see that increasing the value, set by default to 50mm, will have a zoom effect, while decreasing it will give us a wide-angle view. Through Shift x/y we can move the visible area in the lateral and vertical direction with values from -2 to +2. Note that this will not result in a real movement of the camera, which remains stationary in 3D space, but a translation of the field of view with relative optical distortion (rather evident for shift values above 1 and below -1). The Clipping parameters (Clip Start, End) are very important, which define a range of proximity and distance beyond which the camera will not render the scene (not even in the 3D View) and objects close to the visual horizon will be “cut off”
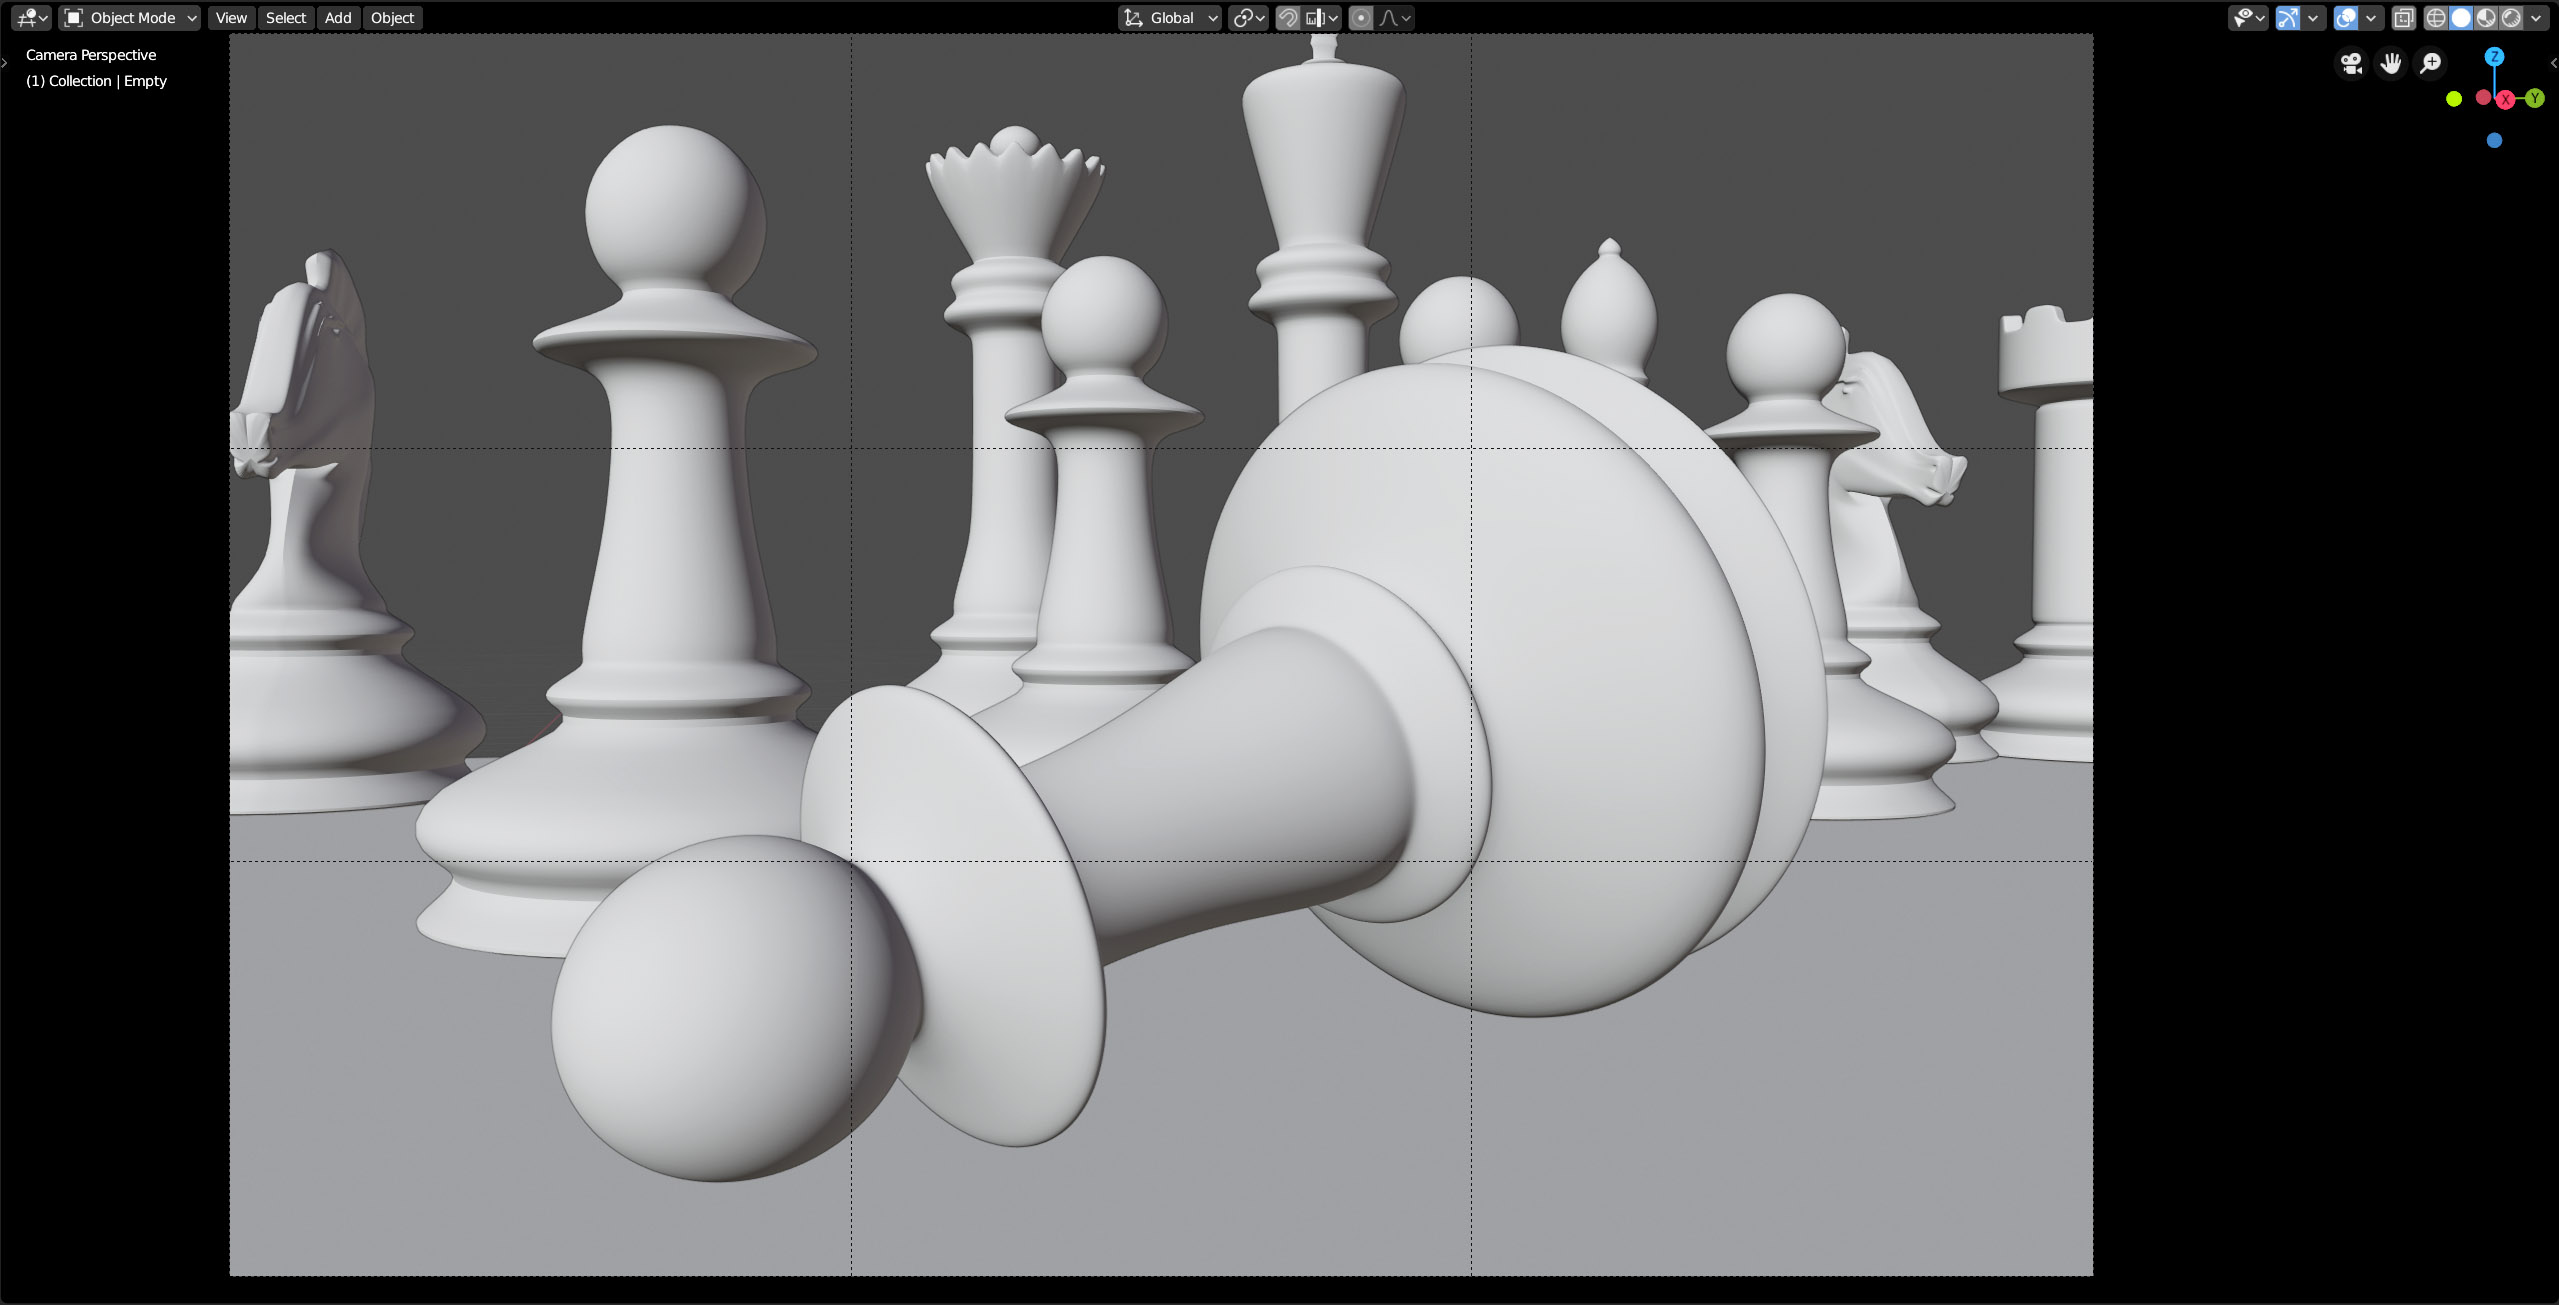
Let’s now activate the Depth of Field (DoF) panel. Depth of field allows you to obtain more realistic renders and is a technique that is quite easy to learn if you have some familiarity with photography and lenses. Otherwise, you just need to follow these few guidelines. With the default settings of the blender camera, any object will be in focus regardless of the distance from the lens. Using the options in the Depth of Field panel, we can simulate the depth of field effect, that is, a range of distances beyond which objects will progressively become blurred. By setting a focus point, whether it is the center of a mesh indicated in the Focus on Object field or through a value in Focus Distance, everything placed at that distance from the camera will always be in focus. The rest will start to appear blurry only by setting low F-Stop values (a typical range is between 1.0 – 2.8). F-Stop is a scale related to the aperture of the diaphragm used for real lenses. In Eevee this phenomenon is very well replicated so that, as in reality, focal length also influences the depth of field. In fact, by increasing the focal length and keeping the f-stop constant, objects will tend to blur more. The images at the top of the next page show two renderings with an f-stop of 1.0 and a focal length of 35 and 75mm, respectively.

In photography, the blurred effect makes images more interesting and beautiful to look at. Our renderings will also be more realistic and pleasing with depth of field. If you are just starting your journey in the world of 3D graphics, I recommend practicing digital photography as a hobby because it is closely related to 3D graphics.

Even though they are virtual, our shots should follow the general rules of photography composition and therefore we have the useful Composition Guides available in the Viewport Display panel of the camera’s object data context, including the classic thirds related to the rule of thirds.
In the rule of thirds, the composition is divided into nine parts (regardless of its proportions) and the subject or part of it to be highlighted will be placed along the lines of force, and more precisely at their points of intersection.
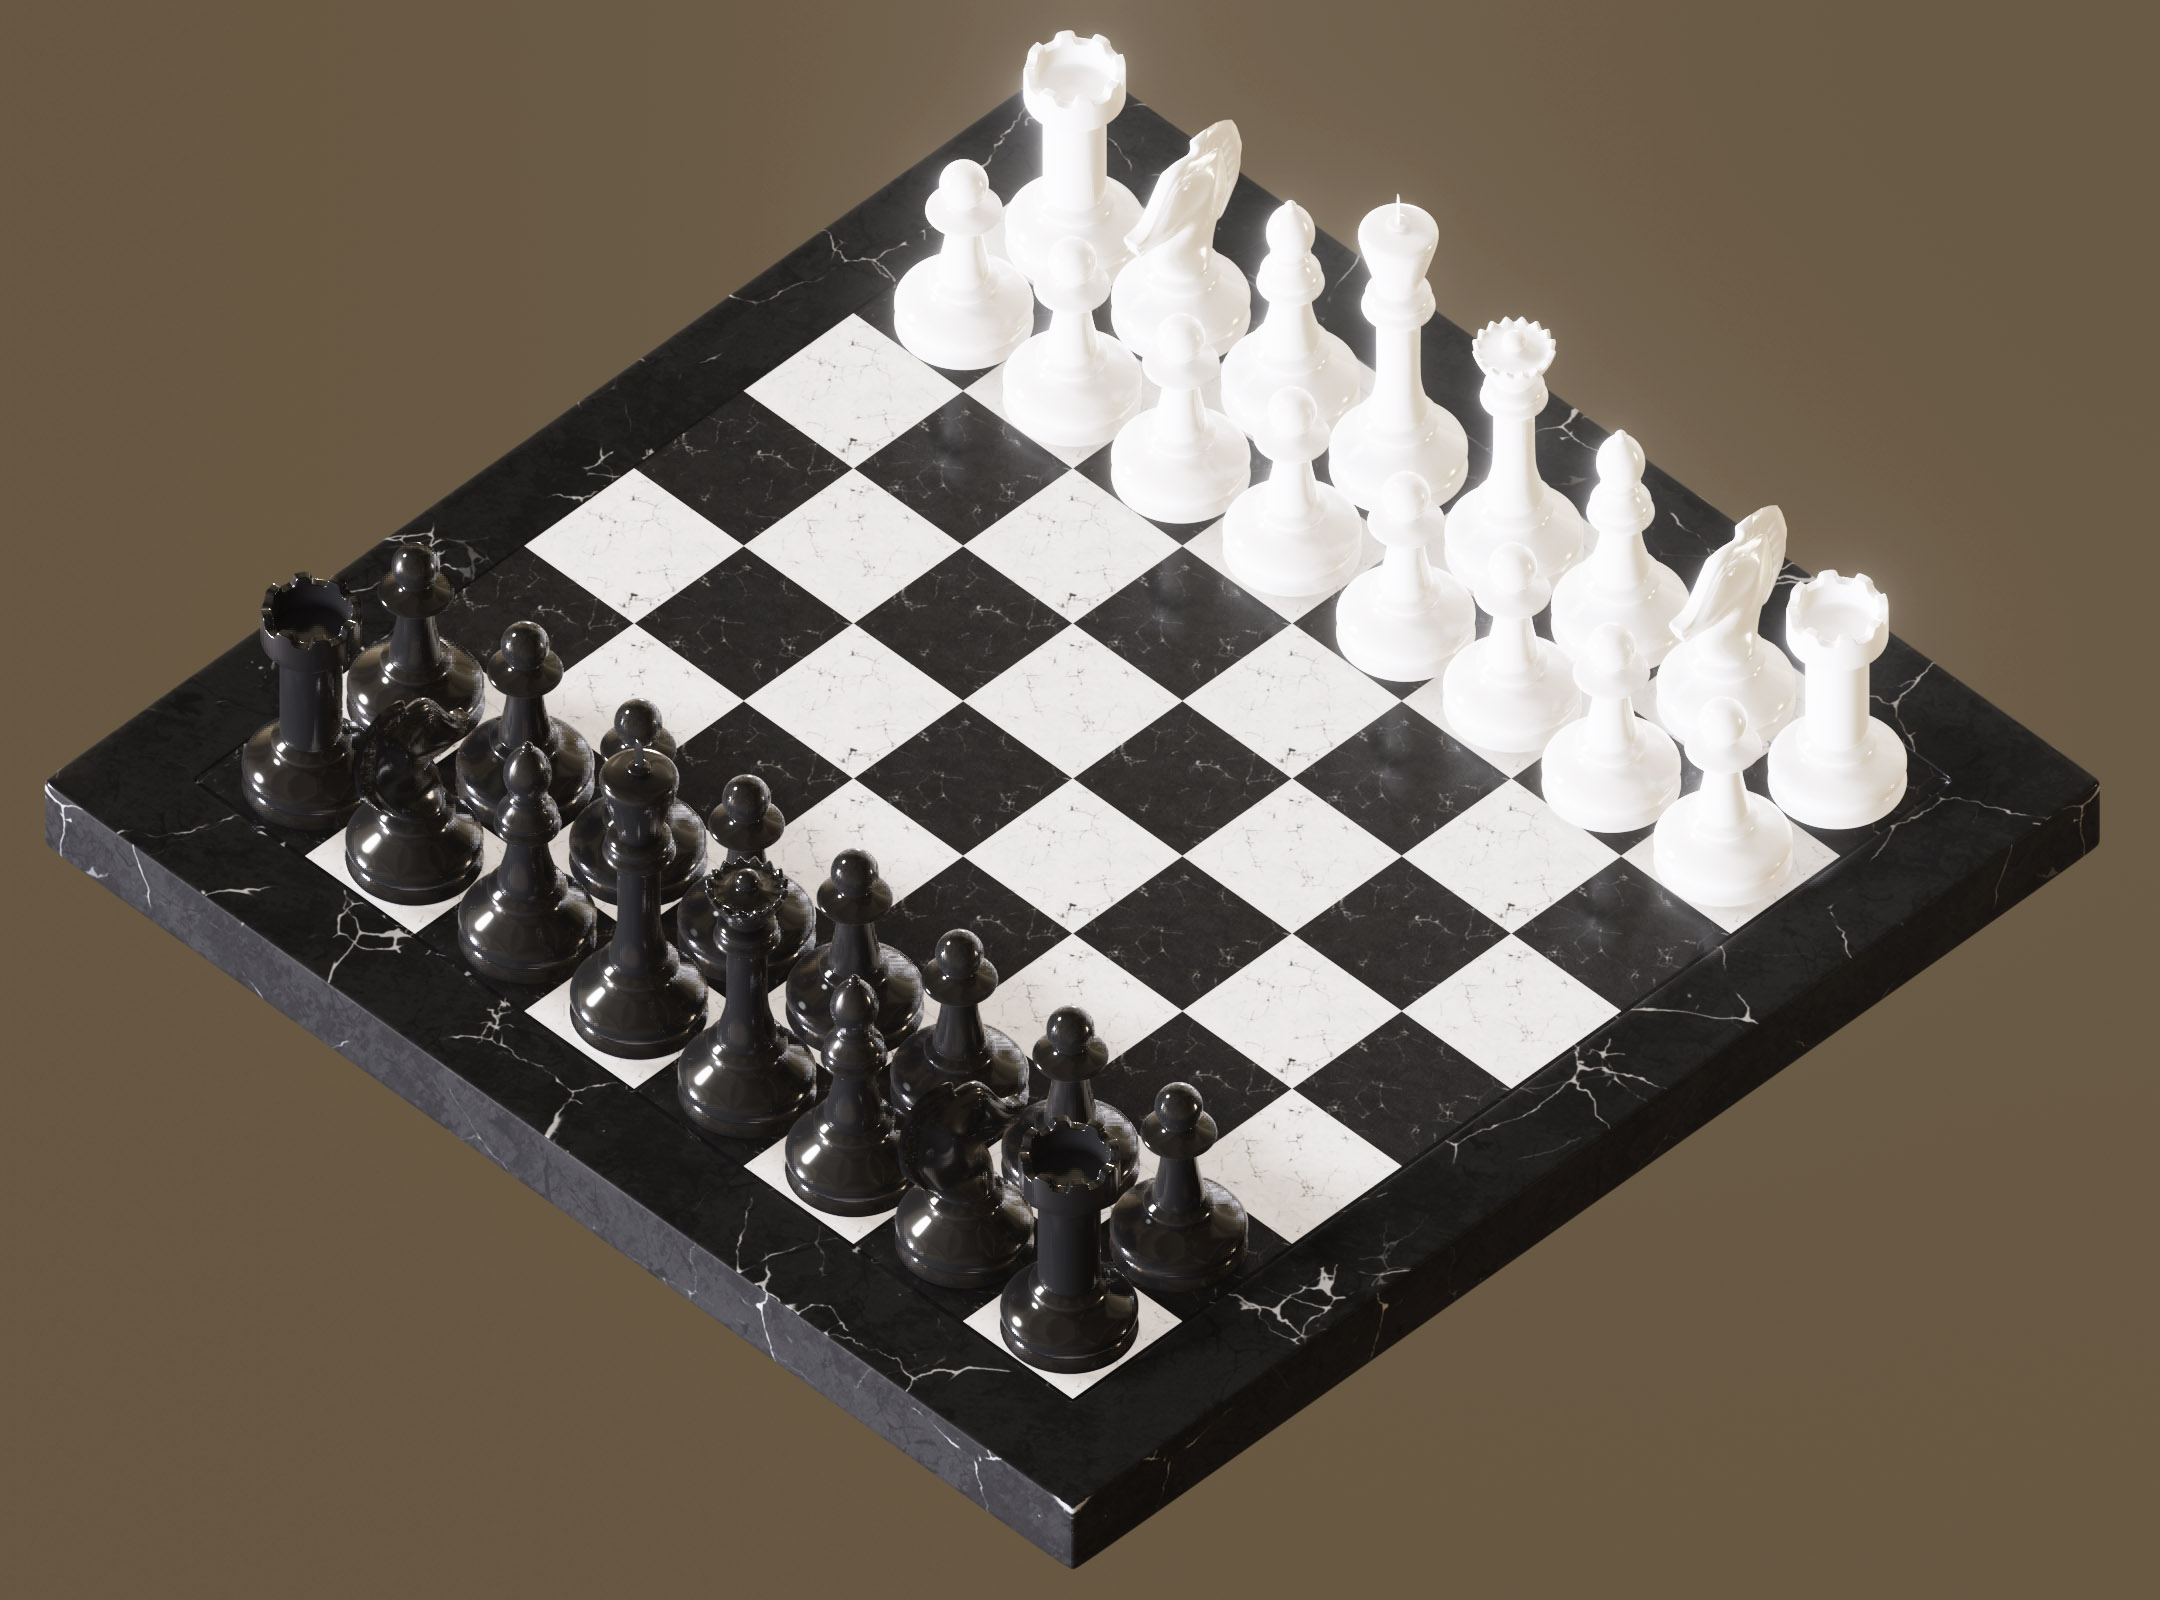
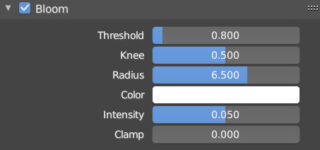
The last feature of Eevee to be analyzed is the Bloom effect, which makes the directly illuminated areas of surfaces more luminous with a kind of surrounding glow. In the following images you can see the difference between a render with bloom activated and then deactivated.
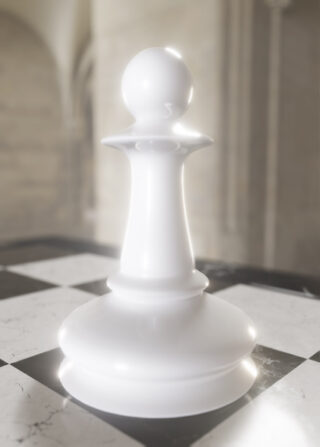
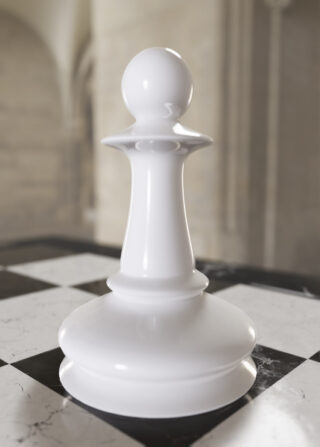
The options for this effect can be found in the Bloom panel of the render context. Intensity is the main parameter, and you can change the color of the glow which is white by default.
Next paragraph
Previous paragraph
Back to Index
Wishing you an enjoyable and productive study with Blender, I would like to remind you that you can support this project in two ways: by making a small donation through PayPal or by purchasing the professionally formatted and optimized for tablet viewing PDF version on Lulu.com